There’s well over 2,000 Animoog presets available now, lots of them free, and let’s be honest, the official mean to install third-party Animoog presets with iTunes is cumbersome and limiting. Animoog players ask the question often enough that I’m convinced it’s worth providing these step-by-step instructions on how to install third-party Animoog presets and timbres with iFunbox.
What are the benefits of of using iFunbox for installing Animoog presets and timbres?
- You can quickly and easily install new Animoog presets and timbres from your computer to your iPad or iPhone
- You can create folders and move presets in the folders you want
- You can rename Animoog folders and presets, and thus order them to your liking
- You don’t need iTunes which, for installing presets, is error-prone and for some of us, simply does not work
- You can import your own presets for backups and then share your own presets with others
- You do not need your iPhone or iPad to be jailbroken for installing Animoog presets and timbres with iFunbox

Is iFunbox safe? I’m not kidding, this is important: no one wants to install malware on his computer and suffer the consequences. I spent significant time searching the web and found no evidence that iFunbox would be malware. The proprietary software will show you ads but no source provided indications that iFunbox is unsafe in any way. If you have good reasons to believe installing iFunbox is actually unsafe, let us know in the comments below!
With these instructions, you can easily install plenty of great third-party Animoog presets, lots of them free, provided by nice sound designers sharing their work with us
The step-by-step instructions:
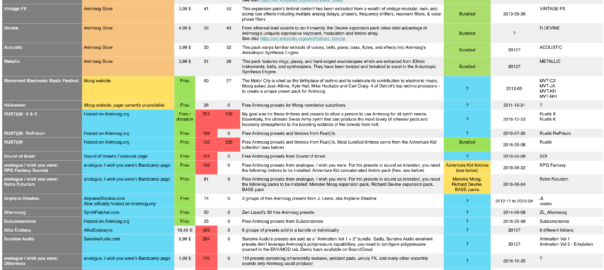
- Get the new and shiny third-party presets and timbres you want to install. You’ll find them on this table of Animoog presets and timbres
- Download iFunbox. I’ve seen reports that other similar tools work as well, if you can confirm, share it in the comments below. iFunbox is free and ads-supported, and I’m not related to them in any way
- Launch iFunbox. On macOS, the first time you launch an unsigned app you need to right-click on the app’s icon and select open
- Quit Animoog on your iPad or iPhone. To do that, double-tap on your iOS ‘Home’ button, browse opened apps to find the Animoog app and drag its thumbnail up to quit the app. If you ignore this step, you won’t see the new presets until you quit and relaunch Animoog
- Plugin your iPad or iPhone. It will show up in iFunbox
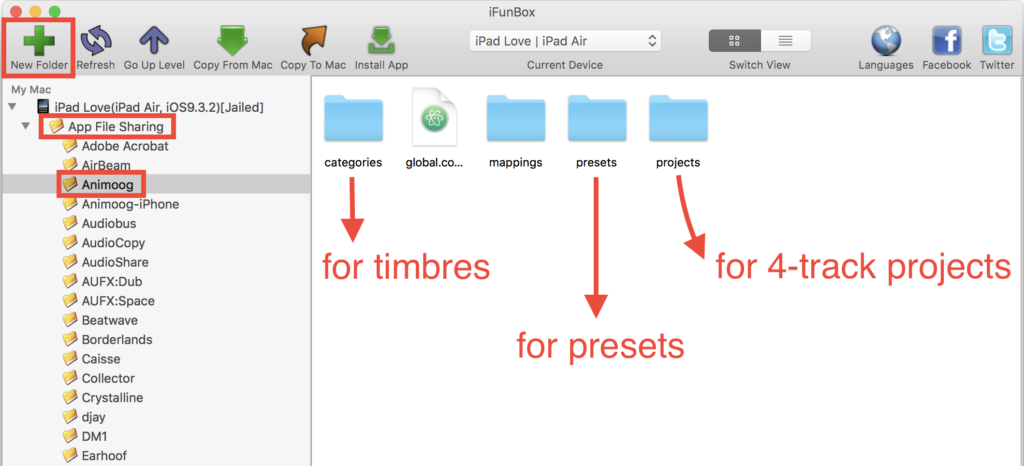
- Open the Animoog folder under ‘App File Sharing’. See screenshot above. The Animoog folder under ‘User Applications’ can’t be accessed and that’s fine since you don’t need it
- Create a new folder to host the presets you want to install
- Open the new folder and move your Animoog presets from the finder to your new folder. Note about the location of timbres: you can apparently copy your timbres in any folder under ‘categories’, presets are able to find the timbres no matter which subfolder there are in
- That’s it! You can use this opportunity to move and rename folders and presets while you’re there, otherwise you’re done, you can quit iFunbox and unplug your iOS device. When you’ll relaunch Animoog, the new presets and timbres will be there for you to enjoy!
If anyone knows better options than iFunbox or have related tips to share, simply write a comment below for all the community to benefit from your knowledge. Better together! :-) Maybe a future Animoog version will provide a better official option than the current one that relies on iTunes, that has been on our Animoog wish list since day 1, but as of today, using iFunbox is a useful, simple and free way to manage your Animoog presets.
And for those who read so far, I have good news, I got tons of fresh new presets for you from a few nice Animoog sound designers that contacted me. The new presets will be announced with the next version of the table of Animoog presets. I hope to have the time to release it by mid-July. Hope this post helped you better enjoy Animoog :-) — Alex / Satri


